Followers

Friday 27 December 2013

Allsorts Challenge/Brown Blue and Aqua / Stamping Dragon Designs

I made this card for the Allsorts Challenge use Brown Blue and Aqua
http://allsortschallenge.blogspot.com.es/
and the Stamping Dragon Designs
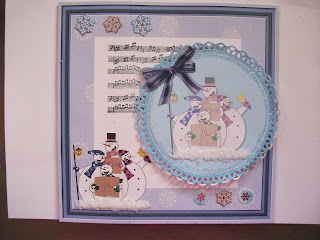
I used a wonderful image from Stamping Dragon Designs
http://dragonslairdesigns.com/shop/index.php?main_page=product_info&cPath=403_409&products_id=3227

where i'm lucky to be a FB DT
https://www.facebook.com/groups/427447597324391/

This digi stamp is one of my favourite images for Christmas and it is also available as a general image http://dragonslairdesigns.com/shop/index.php?main_page=product_info&cPath=403_418&products_id=1055
to colour or ready coloured. I coloured it with promarkers and cut it out then layered it on a scrap of white card that i had put purple glitter paste through a mask. Then I layered it on Kraft Card and some purple star patterned mirror board from Creata. I took another piece of Kraft Card and stamped on it with Versamark and the Justrite Secret Garden stamp. Then I brushed blue mica powder over it and set it with some hairspray. I used one of the Grand Square nestabilities and cut a Kraft Card layer and a mirror board layer and put my stamped section on this. I used an 8x8 card with a piece of pale blue and white card on it from my stash. I also made apaper ribbon with a Martha Stewart snowflake die in the purple mirror board, then I used a tonic hearts punch on blue paper and layered it on top. I put my card together with my topper at an angle and used a Crafters Companion Diesire snowflake die to cut some snowflakes which i layered. In my stash i already had the mdf tree which i'd covered with pinflair glitter paste and then put some gold paste through a mask to embellish so I added it to the corner as my finishing touch. Let me know what you think :).
Please check out our FB page https://www.facebook.com/groups/427447597324391/ for fun challenges and loyalty points and our Challenge Blog is http://stampingwithdragon.blogspot.co.uk/ we also have a sister blog the Dragons Den http://stampingdragondesigns.blogspot.co.uk so pop in and see us sometime we'd love to chat to you.

Crafters Companion and Friday Sketch Challenge

This card was made for the Crafters Companion Challenge http://www.crafterscompanion.co.uk/blog/crafterscompetition/2013/12/ribbons-are-everywhere/

and the Friday Sketch Challenge
http://fridaysketchchallenge.blogspot.co.uk/

This is the first time i have entered either of these challenges despite owning quite a few CC products. I have had some more time lately so I went looking on the net and found them. On this card I used the Party Paws bears the CC Christmas tree and the CC Diesire snowflakes. I used some red patterened mirror board from Creata and layered in on some blue card on an 8x8 base. I die cut my topper with a blue mat behind then I used a mask with blue glitter paste through it on white card with a red mat behind. I used an off cut of red snowflake card with the same red mat behind.with a blue paper ribbon across as per the sketch. I put the xmas trees with the topper on top of the glitter paste mat and put some twine across then embellished with the snowflakes and some red gems. I also used the precious snowflake die to embellish with too. I enjoyed combining these but prefer not to use them for too many challenges as it might diminish the joy of acutally creating for something specific. Hope you like let me know plz. :)

Thursday 26 December 2013

A different kind of Christmas Card


Created for
Bunny Zoes Crafts  http://bunnyzoescrafts.blogspot.co.uk/2013/12/our-last-challenge-of-2013-wings.html
Challenges for Everybody  http://challenges4everybody.blogspot.co.uk/
A Creative Romance  http://acreativeromance.blogspot.com.au/
Crafting from the heart  http://craftingfromtheheartchallengeblog.blogspot.co.uk/
Countryview Challenges  http://countryviewchallenges.blogspot.co.uk/2013/12/whoo-hoo-its-nearly-christmas.html

I created a totally different type of Christmas Card this time starting with my signature 8x8. First I picked my fairy topper from my stash and put some glitter on her wings, then i put some half pearls around the card edge. I used a SB m bossabilities Folder EL 005 on a piece of lilac pearl card. I used my precious snowflake die from memory box along the top and a die cut from my stash behind the fairy. I stamped and embossed a sentiment in purple on shape from my stash. Then i matted the lilac on black card and ran some purple gem string and black and silver gem string from my stash along the bottom. To finish i dotted some lilac gems on the die cuts. This was quite a quick and easy card to make I got the idea from the Bunny Zoes Wings Challenge another great way to get inspiration and make you do different projects for holiday periods.

Christmas Card for Challenges


This card was made for the Challenges 

Christmas all year round  http://christmascardsallyearround.blogspot.co.uk/
Aud Sentiments   http://audsentimentschallengeblog.blogspot.com.au/
Whoopsi Daisy  http://cutedaisymay.blogspot.com.au/
Pauli Holifield Crafts   http://paulaholifieldcrafts.blogspot.co.uk/2013/12/albc-christmas-cheer.html
Milk Coffee Challenge  http://milkcoffeechallenge.blogspot.co.uk/
A Creative Romance http://acreativeromance.blogspot.com.au/
 Fashionable Stamping  http://www.fashionablestampingchallenges.com/?p=7637

To make this card I used a 5x7 card base which is unusual for me as I prefer 8x8 but i have lots of other sizes in my box so i'm trying to get them used and get out of my comfort zone at the same time.  I stamped a Kanban stamp in versamark then embossed it in gold embossing powder and cut it out.  I used a red die cut from my stash (no idea what it is) then used a SB die to cut a mat for it in gold.  I then mat and layered these on red card which i punched the bottom with a tonic diamond swing punch and gold embossed card from my stash.  I cut two corners in white pearlescent paper with a memory box die. I added a Merry Christmas and Joy Sentiments and some white half pearls of different sizes. Then I used some baubles and red bows from my stash to finish.  I really love this card now but half way through making it I wasn't a fan at all. It just goes to show that you should persevere cos quite often the last thing you add is what makes the card perfect for you. Every little thing you add can change a card in a big way so don't give up. And remember the only person who has to like it is you others are just a bonus. Personal taste is everything. Till next time.


Tuesday 24 December 2013

Less is More

This Card was made for the Less is More Challenge week 14 White on white  http://simplylessismoore.blogspot.co.uk/
and Crafty Hazelnuts Christmas Challenge
http://craftyhazelnutschristmaschallenge.blogspot.co.uk/

Its a simple card with maximum impact. I embossed an A5 centura pearl card base with a CC snowflake folder. I used a CC snowflake die and another hanging snowflake die (can't remember who made it). I put a piece of white on white dotted ribbon round the card with another piece of lace ribbon below it from my stash. I covered the larger snowflakes with glue and sprinkled iridescent glitter over them. And i finished it off with some aurora borealis  gemss. I have to say that this card was quite difficult for me and it took a couple of days for it to come together  but I do love the finished project. It took me out of my comfort zone which is a good thing as it made me explore different ideas and areas of card making. When i make any card I look at the finished project and think "would I like to receive this" and if the answers yes great, but if the answers no then its back to square one! I refuse to make a card that i would not be happy to receive.  Everything you make should be the best of your efforts.

Saturday 21 December 2013

Bestie Challenge


I made this card for the Final Bestie Challenge of the year http://bestieschallenge.blogspot.co.uk/2013/12/christmas-glitter-last-challenge-of-year.html

I can't remember what my image is called but its one of Sherrie Bests girls.  I also used

red mirror card
green mirror card
a Sue Wilson embossing folder A4
a SB die
gilding flakes
Crafters Companion snowflake die
SB poinsettia die
Precious Memories snowflake die
a robin, sentiment and gems from my stash

Let me know what you think?

Challenge entry

For Challenges Cards Galore http://cardsgalorechallenges.blogspot.co.uk/ 
Feeling Crafty http://feelingcraftychallenge.blogspot.co.uk/

I made this card with stuff i had in my stash.  I used 3 mdf xmas trees that i either painted or inked and then embossed in gold and red. Then i put gems on them. I used gold embossed card with some card from a Hunkydory kit as a background. I made an easel card and used them same card to mat and layer the bottom. I cut a strip from another Hunkydory piece of card then put it on foam pads for the stopper with a black Merry Christmas on top and some black gems along the edge to finish. Let me know what you think.

Ribbon Reel Challenge

For the Ribbon Reel Challenge http://theribbonreelchallenge.blogspot.co.uk/ 

After a play day with my nephew Tyler during the week I already had the heart and background made as i was teaching him how to use masks and glitter paste.  The background is a blue/green colour through a frame mask and the same ink on the heart with purple glitter paste through a different mask. I mounted the heart onto a white one from my stash and put some pink half pearls all around it and in the centre.  The bottom is two corner snowflake dies in teal blue glitter card. I put some pink hearts from my stash on each corner with a green half pearl in each. I used a bit of purple ribbon with a green bow on top a just for you sentiment ans a pink heart gem on top to finish. Hope you like. xx

Friday 20 December 2013

Rocky in traditional gold and red colours


I made this card with traditional gold and red colours and using the Rocky image from SDD http://dragonslairdesigns.com/shop/ which i coloured with Promarkers. I used some red patterned mirror card from Creata and some Craftwork cards Kraft Card. I used a A5 card for my base and layered it with the Kraft card then the red mirror card. I used a piece of white card a bauble stamp and red embossing powder to create a back ground. Then i used a SB die to cut out Rocky and the 2 back layers. I used some red and gold ribbon across the card and as a large bow on the front with some Ivy leaves cut with a Crafters Companion die and some foliage from my stash. I'm entering this card in the following Challenges.
SDD CHALLENGE Anything goes http://stampingwithdragon.blogspot.co.uk/
CHNCC  http://craftyhazelnutschristmaschallenge.blogspot.co.uk/
A GEM OF A CHALLENGE  http://pinkgemchallengeblog.blogspot.co.uk/
GLITTER AND SPARKLE  http://glitternsparklechallengeblog.blogspot.co.uk/
CREATIVE INSPIRATIONS PAINT http://www.creativeinspirationspaint.blogspot.co.uk/2013/12/inspired-by-anything-goes.html
CRAFTY GIRLS CHALLENGES http://4kraftygirlzchallenges.blogspot.co.uk/
DIE CUTTING DIVAS http://diecuttindivas.blogspot.co.uk/
CRAFTING DESERT DIVAS http://www.craftindesertdivas.com/

Thursday 19 December 2013

Stamping Dragon FB Inspiration piece for 20th December 2013


My last Inspiration piece before Christmas on Stamping Dragon FB page
https://www.facebook.com/groups/427447597324391/601209996614816/?notif_t=group_comment

I used the Christmas1 Sentiments http://dragonslairdesigns.com/shop/index.php?main_page=product_info&cPath=644_529&products_id=2180

I think this card is extremely simple but rich and elegant. I cut a square of black card and used a punch on one edge. I used a lace mask with sand glitter paste through it and layered it on embossed gold and white card. I cut the sentiment out with an SB die and put a gold gem on each corner. I used an 8x8 card which i mat and layered with gold and black card with black and white ribbon across it. I put my sentiment on and used a gold gem strip to finish. I love the finished effect.

Check out our Challenge blog at http://stampingwithdragon.blogspot.co.uk/ and our sister blog the Dragons Den http://stampingdragondesigns.blogspot.co.uk/ for more inspiration, tutorials and fun.

Wednesday 18 December 2013

SDD FB DT Inspiration piece

I made this card for the SDD FB Design Team Inspiration piece in January 2014https://www.facebook.com/groups/427447597324391/

but i designed it in line with the Fusion Card Challenge Sketch
http://fusioncardchallenge.blogspot.co.uk/

I used the New Home Card Kit and Insert Set http://dragonslairdesigns.com/shop/index.php?main_page=product_info&cPath=644_610_629&products_id=3017

I used a background i had already created with a Stamps Away Mask and glitter paste. I lined this with some orange pearlescent card. Then I lined my topper with dark green mirror card. I cut a decorative strip in dark green and mirror card with some Tonic punches and used some gold, green and orange card to make the banners coming from the With Love Sentiment at the top then I placed the Mum Sentiment at the bottom. I finished off with some orange ceramic and paper flowers from my stash.

Please check out our sister blog The Dragons Den  http://stampingdragondesigns.blogspot.co.uk/ and for more fun activities our FB group https://www.facebook.com/groups/427447597324391/

Tuesday 17 December 2013

Stamping Dragon Designs Challenge Anything but a card

Entry for Stamping Dragon Challenge Blog  http://stampingwithdragon.blogspot.co.uk/ closing 19th December 2013.  Not a great picture but the best i can do for now. Some bunting for my new baby Grandson T Jay. I used some bunting card shapes and covered them with some colourful papers. I embossed the card alphabets in blue powder. I used the Rupert Fawkes digihttp://dragonslairdesigns.com/shop/index.php?main_page=advanced_search_result&search_in_description=1&keyword=Rupert+Fawkes
and the smile from the Happy Themed Definitions
 http://dragonslairdesigns.com/shop/index.php?main_page=advanced_search_result&search_in_description=1&zenid=5svtgmtorhnnmnonjtg28t8656&keyword=Happy+theme+definitions. Then I added some peel off borders, teddy bears, ladybirds and a car from my stash. Just some ribbon to add when its dry.  As its TJ's 1st Christmas and he'll only be 7wks we're not buying any big presents just some clothes and practical things like a baby bouncer. So this is a nice little personal touch for his room.
Take a look at out facebook page https://www.facebook.com/groups/427447597324391/ and the dragons den blog and join in the chat, challenges and fun. http://stampingdragondesigns.blogspot.co.uk/

Friday 13 December 2013

Christmas Cards using Stamping Dragon Images


Below are a couple of Quick Christmas Cards I did using some SDD images and bits from my stash.
No 1 is using the gorgeous Winter Beauty http://dragonslairdesigns.com/shop/index.php?main_page=product_info&cPath=403_409&products_id=1106 I coloured the image with promarkers and then cut it out. The background is done with ink through a snowflake mask and the edges are inked too. I used pads to put the image on and then added an mdf xmas tree that i used green ink to colour too. I put some red glitter on the berries in her hair and some different red gems in the snowflakes and on the tree. 
I am entering this card in the CHCC http://craftyhazelnutschristmaschallenge.blogspot.co.uk/


This one was done for the December colouring Challenge on the SDD FB page.  Each month you are given an image to colour and make a project with. You then upload this to the site. If you don't make and upload a picture of your project you are not allowed to take part in the next months challenge. A winner is drawn randomly and they receive a prize.  This month we were given the lovely image of Rocky (who is actually the toy are Queen Dragons son had when he was small). My nephew Tyler likes to have a go colouring every Wednesday so I put 4 images on 1 page and printed off a few pages. This gave me lots of images to use so I created a family for Rocky. I coloured them all differently and cut them out using a SB die. I used another SB die to create the red frame for each picture then mounted them on a gold rectangle cut with a SB die.  I used a Crafters Companion icicle die on white pearlescent paper for the bottom of each picture then laid them out. I used a Precious Snowflake die and put 4 or 5 on the card too and to finish i placed some tiny red gems on the snowflakes.


Stamping Dragon FB Design Team entry for week beginning 9th December 2013

http://dragonslairdesigns.com/shop/index.php?main_page=product_info&cPath=644_610_623&products_id=3144

For my DT entry i used the Vintage Santa Card kit which is so real and just how i imagine Father Christmas looked. I built the pyramage up and put the Merry Christmas on. I made it for Granda as it just seemed so appropriate. I then layered some brown paper onto gold card and added a broad gold ribbon with a chocolate brown narrow velvet ribbon to draw your eye across the page. I simply layered my image onto this and added 4 gold corners from my stash and a deep red poinsettia cut with a SB die. I am entering this card in Crafty Hazelnuts Christmas Challenge  http://craftyhazelnutschristmaschallenge.blogspot.co.uk/

Friday 6 December 2013


A card made for the Crafty Hazelnuts Christmas Challenge 

Made using some free frames from Stamping Dragon Designs FB page https://www.facebook.com/groups/427447597324391/   

I used a snowflake corner die in blue glitter card on cream patterned paper and red mirror card.  I coloured the free digi with promarkers cut some poinsettias with a SB die and some blue leaves with a diesire die. I put the image on a red velvet mountboard from my stash then onto the frames. I used a free tag die from a magazine and cut it in blue and red after stamping merry xmas with a free stamp from a magazine.  I added the poinsettias and some flowers from my stash.


Hi all here's my dt piece for the Stamping Dragon FB page 


I used the pup money wallet on top of a card to give a present and card all in one!  http://dragonslairdesigns.com/shop/index.php?main_page=advanced_search_result&search_in_description=1&keyword=pup+money+wallet


I decoupaged the pup then placed him on the money wallet with the presents in the foreground and behind.  I put a Just for You on wallet and some gold borders. I used and 8x8 card with some green mirri card embossed with a snowflake Crafters Companion folder. I then used a co-ordinating piece of scrap blue card  that i'd put white glitter paste onto through a mask. I used a tonic punch on both sides of another piece of scrap card and some gold ribbon on top of this. I made a white paper flower and put a blue gem in it with some fringed card around it, and some gold leaves. I place a gold matching sentiment on top to finish. Hope you like! 

Sunday 1 December 2013

For the quickie challenge on Stamping Dragon FB page. 


Using the image of Penny and lulu by the fire


I used an inner and outer tonic die to cut the image with and then layered it onto pink card with co-ordinating blue behind it. I put a pink merry xmas ribbon down the side with more pink and blue card and some white scallop edges. I finished with blue and pink gems and a large blue snowflake under matching ribbon bow.

See more inspiration and ideas at the Dragons Den.

 http://stampingdragondesigns.blogspot.co.uk/

Sunday 24 November 2013


Autumn Challenge on Stamping Dragon Designs Using Autumn Leaves

My card for the Challenge on Stamping DragonAutumnChallenge http://stampingwithdragon.blogspot.co.uk/.
 Using an A5 card I stamped a leafy background on red card with gold wow powder. I placed a Crafters Companion Christmas image on some red card and a gold ribbon under. I cut my leaves out of card and gilded them to get some great autumn colours. I put my leaves on the ribbon and put some green, red and white foliage under one side of the ribbon to finish. Remember to check out the stamping dragon fb page to see some of my dt work and join in the fun.  .https://www.facebook.com/groups/427447597324391/

Friday 22 November 2013

PURPLE AND TURQUOISE CHALLENGE


A quick card made for a challenge. I knew i already had a topper with perfect colour's for this challenge and a purple background which i made with a leaf and flower mask with purple glitter paste through it. I lay this onto some turquoise card and and placed the topper onto, I found a silver circular frame in my stash too. I put a white heart die under the top corner of the topper with another purple and white on that. I finished off with a few embellishments and sentiment from my stash.


Tuesday 19 November 2013


I started this card at 6am when I couldn't sleep lol. I used a red and gold embossed paper a brown paper and a gold and cream paper. I used a topper from Stamping Dragon Designs and its backed by a pieced of red card embossed with gold texture paste through it then cut with an SB die, the stopper is also an SB die. I added some wooden xmas words, ribbon, snowflakes, sentiment and flowers.
I'm entering it in the following challenges:
Stamping Dragon FB challenge https://www.facebook.com/events/471060099676582/
Creative Craft Challenges 2 http://creativecraftchallenges2.blogspot.co.uk/
By Lori Designs Challenges  http://loriboyd2.blogspot.co.uk/
Sisterhood of Crafters  http://thesisterhoodofcrafters.blogspot.no/
Crafty Girls Challenges http://4kraftygirlzchallenges.blogspot.co.uk/
Desert Island Crafts Challenge http://desertislandcraftschallenge.blogspot.co.uk/  Indian Corn Colours, 3 layers, embossing, ribbon and die cuts.
 
Jiggy and presents. A bit of Bling.

 
And a distressed look.
 
A dinky little snow globe with a gorgeous Dragon from Stamping Dragon Designs. http://dragonslairdesigns.com/shop/index.php?main_page=product_info&cPath=403_409&products_id=1758 made for the Dragons Den Challenge (use a dragon). http://stampingdragondesigns.blogspot.co.uk/
 
I put two aperture's together for this. I used a background I'd already made, blue card with white glitter paste applied through a mask. I cut two pieces and put them back to back with a Jiggy and presents on each side. I put some polar white flowersoft and a little white glitter on each and stuck them together using super sticky red tape. I added some blue bling on one side and some gilding flakes on the other in a distressed way. I then cut two poinsettias one with a SB die and one with a Marianne die and put one either side to finish. Hope you like :). Till l8r xx
 
Take a look at the Stamping Dragon Facebook page to see more Dragons and join in the fun. https://www.facebook.com/groups/427447597324391/
 

Tuesday 12 November 2013

A New Home for Christmas


This card was really appropriate as I have a friend who desperately needs a new home for Christmas. I've used this card in a SDD FB DT Challenge and Its also entered into Crafty Hazelnuts Christmas Challenge. http://craftyhazelnutschristmaschallenge.blogspot.co.uk/

I used brown paper from SDD Coffee cream card papers  http://dragonslairdesigns.com/shop/index.php?main_page=product_info&cPath=437_506&products_id=1856 and red coated shiny card and some white linen card. I cut the 3 sets of panels and then layered them. Then I coloured the image with promarkers and added a white icicle diecut to the bottom.  I used a birdhouse xmas tree decoration and a strip of acetate on it behind the first three panels to make it swing. I put some ribbon and a gem on top. Finally I typed my sentiment and layered it banner style.

A Challenge Entry


I am slowly getting to grips with blogging and being a DT. I find the uploading and writing easy and once I get to grips with software i'll be elected lol. Its hard to believe how far computers etc have come in the past ten years.  I used to teach beginners and now I feel like a beginner. But anyone now i'm confident in my DT role over on SDD FB page I branching out. So I've made this card and it was quite a quick one as i'm it was all pre prepared. I just put the elements together. I used a 6x6 card which I lay a frame mask over and put gold glitter paste through. I found the bears in my topper box and I already had the SB die cut in there too. The tree is an mdf one with double sided adhesive on it and gold glitter on top. I then placed small red and gold gems on it to decorate. I put slightly larger red gems round the outside. And used a gold embellishment behind my sentiment with some leaves and twigs to finish.  I am entering this card in
  Sparkles Christmas Challenge  http://sparklesforumchristmaschallenge.blogspot.co.uk/
  A Gem of A Challenge   http://pinkgemchallengeblog.blogspot.co.uk/

Saturday 9 November 2013

http://dragonslairdesigns.com/shop/index.php?main_page=product_info&products_id=3227

Winter Beauty Bauble from Stamping Dragon Designs and coloured with promarkers makes an awesome Christmas Card. Also used purple glitter paste thru a corner stencil. Then green glitter paste with a holly stencil added some half pearls in red a couple of gold corners, some gold leaves and green and lilac ribbon.

DT card for Stamping Dragon Designs 8th Nov 2013 using Rupert Fawkes


For this weeks FB DT project I appropriately used the Rupert Fawkes Digi Stamp. I coloured him in with a blue promarker for Rupert and a brown one for the hat and dynamite. For the background I used a piece of blue card and on the corners I used some gold glitter paste thru a starburst firework stencil with a gold gem on each corner. I then layered it onto some gold embossed card. I cut him out with a SB circle die and inked thru it with a blue distress ink, I added some blue dew drops and then cut a gold circle for the back of this. I used a 6x6 card base and folded the top of it corner to corner to make an easel card base then I glue my top piece to this. I used a matching piece of blue and gold card for the bottom and added a gold peel off in each corner then picked a gold sentiment and put it on foam pads for the stopper.
 
Keep a look out for our Challenge Blog The Dragons Den


Two Christmas Cards suitable for men using a Sheena Douglas stamp, some Spellbinder dies and embellishments from my stash.


Another card suitable for men using a Chloe background stamp and a Crafters Companion Topper with a few embellishments from my stash really easy to make.

 
Back to my girl fest lol. This card has an mdf xmas tree shape on it which has been gilded using a double side asdhesive sheet and silver gilding flakes. A piece of pink organza has been wrapped round the card base then some plain and patterned matching papers cut with SB dies were layered with the tree on top. A matching pink bow was made with two pins and a large silver gem finished it off.


A while ago as a Challenge on Stamping Dragon Designs FB page where I am a Design Team member as a Challenge I was asked to take a picture of anything in my stash that I had not bought. I had a box of dissected jewellery bits so took a photo. I was then challenged to make a Christmas Card using these so I thought yippee what a treat and set to work using 6x6 card bases. The top card was so easy as I used my fav colour purple and cut out two sized of a Spellbinder Decorative Labels die in two colours. I'd already stamp and embossed a SB bauble with a purple Chloe wow powder. So I simply glued a silver pendant end onto this then onto the die cuts. At the bottom I used a Tonic punch on the edges of  a left over piece of card then added my sentiment which I cut out with another SB die I added a few large and small clear gems to finish.
The second card includes 3 items from my box in green & gold, a pendant bottom, an owl and a bracelet section. I used a green holographic base and put a gold layer on it made with a holly mask and gold glitter paste. As a side border I used a tonic punch on both sides of a piece of green card I used a piece of embossed gold card under it and glue the bracelet section on top. Using an sb bauble die I cut some green and gold bauble from embossed and flat card and layered these. I glued my owl and pendant on top and added some small gems as the string I added a sentiment and that finished my projects.


 Christmas cards I made on Tuesday using some stamping dragon toppers and my glitter paste backgrounds etc. I've had a play with my glitter paste and masks and now have loads of lovely glitter backgrounds etc ready for making more Christmas Cards. I havn't really posted any of my xmas cards lately as not everyone enjoys making xmas cards all the time but I've found the most awesome blog Craftyhazelnuts Christmas Challenge. Like me she makes xmas cards all year round so i'm gonna show lots more of my xmas cards in future.

Friday 8 November 2013

Alternative Xmas Wreath


Christmas Decoration
I made this using some bits I had and some leaves from Stamping Dragon Designs http://dragonslairdesigns.com/shop/index.php?main_page=product_info&cPath=403_414&products_id=862

I cut some leaves from gold blue and green card then I cut a circle and laid the leaves around that and added some other gold ones I had. The centre is a small £1 decoration from Tesco lol. I also cut some poinsettias in gold and red and added red berries in the centres and all the way round. Then I put a gold bow at top to finish. I love it.

Tuesday 29 October 2013


Todays little project for the Make a Gift Challenge over on the Stamping Dragon Designs fb page. https://www.facebook.com/groups/427447597324391/
 
I found the tutorial on ebay and the project itself (Easel card drawer) was straight forward but unfortunately I had some problems with my Graphic 45 papers. They kept tearing :(. Oh well I finally finished it! I also used a digi stamp from Dragons Lair called Penny's Discovery  http://dragonslairdesigns.com/shop/index.php?main_page=product_info&cPath=403_406&products_id=3053

This card is made using a topper from the Whimsical Christmas Mini Kit found at the
Dragons Lair Designs.  http://dragonslairdesigns.com/shop/index.php?main_page=product_info&cPath=498_525&products_id=2186

I used a 6x6 card base on which I placed a border mask and put silver glitter paste through it. I took some xmas paper from my stash to co-ordinate with my topper and some silver card. Using a Tonic die I cut an oval from the patterned paper any layered a silver one behind. I used a SB bauble stamp and embossed it in pink. I cut a small silver circle to mat my topper on then I put this on my bauble and then onto my die cut shapes. I used a small holly die and stamped it in green on each corner. I then added some pink gems as berries. I found 4small peel off bows and added them on the corners of the glitter paste frame. I finished by adding my sentiment.  You can find it here at Crafty Hazelnuts Christmas Challenge Extra which is for any Christmas Card.
 http://craftyhazelnutschristmaschallenge2.blogspot.co.uk/2013/10/chnc-challenge-extra-for-october.html

Monday 28 October 2013

This card was meant to be a quick card as I had a kit from Crafters Companion and used a topper and paper from it but as usual it took me ages on the embellishments. I also used a Crafters Companion Xmas tree die. A added some gold ribbon at the bottom with a red and gold bow and a gem on top. I put some xmas holly down the side with some gems for my stash then added my sentiments. And finally I put some polar white flower soft from Katy Sue to give dimension and texture.
 
My Christmas card made for http://craftyhazelnutschristmaschallenge.blogspot.co.uk/ this is my first time entering after a friend told me about it when she saw my xmas cards. My card is made using Stamping Dragon Designs http://dragonslairdesigns.com/shop/index.php?main_page=index&manufacturers_id=7 Whimsical Christmas Mini Kit I used the background paper and topper which I cut with my sb die. I used a music stamp I rec'd in a magazine and as my images are carolling snowmen it worked perfectly. I simply placed a smaller circle over my image to mask it put glue on the exposed bit then glittered it. I added a bow and some snowflakes from my stash and my card is complete. Hope you like.

Friday 25 October 2013

http://dragonslairdesigns.com/shop/index.php?main_page=product_info&cPath=498_536&products_id=1337

Hi to everyone hope you're all having fun crafting. This is my inspiration make for the fb dt of Stamping Dragon Designs.  This was a pretty simple and quick card to make. As usual I used my 8x8card except in cream (I can't seem to use anything else)lol.  I made this for my stepsons 30th birthday. I printed off the smile tab and the definition sample after taking them into word and adjusting them how I wanted. I used a piece of black card which I embossed in a CC folder. Then I used my alphabet and number dies to cut out the year he was born, his age and saying.  I used a SB die to cut out the layers for the age then I simply put it all together. So I hope you like it and find some inspiration from it. Pop over to Stamping Dragon fb page and you'll find lots more and some lively chat and fun. See you there. :)  https://www.facebook.com/groups/427447597324391/ also check out our sister blog the Dragons Den http://stampingdragondesigns.blogspot.co.uk/

Wednesday 23 October 2013

The Family's come to visit
 
My October Colouring Challenge card for the Stamping Dragon Design fb page.


My crazy clown balloon picking
 
This is my DT card for SDD fb page for week commencing 18th October.  I already had this clown balloon image and new it would be perfect for it. I chose my colours from the image, I used blue yellow and red card in layers. I put the top blue layer thru a Crafters Companion embossing folder. I used one single balloon image to create this. I copied my balloon into Word then copied and pasted it multiple times. I cut out some of them and using a die cut tree from my stash which I coloured I stuck balloons all over it. I put some grass underneath then placed my clown beside it as though he's picking balloons.  For the top I coloured my balloons then used a tonic diamond swing punch to make a decorative edge. I used some soft blue ink on the edges and put a few blue shimmer flowers thru at intervals and that completed my card.

http://dragonslairdesigns.com/shop/index.php?main_page=product_info&cPath=403_412&products_id=3240

This is my card made for the October card swop on Stamping Dragon Designs fb page. I put double sided adhesive sheet on a piece of black card then put a plastic circle mask over it and rubbed mica beads on the exposed part to create texture. Then I carefully removed the mask and put gilding flakes where it had been. I printed off my image and coloured the pumpkins and owls in then I took a blue alcohol pen and using the broad end totally covered the the whole image and cut out using a SB die. I cut out another spooky tree this time a plain one (also on sdd website). I coloured it orange to match the pumpkins. In the bottom right hand corner I placed a small pumpkin stencil with a witches hat an put glitter paste thru it. I added some leaves and some bats and my Halloween card is finished.

Friday 18 October 2013


For my Stamping Dragon Designs DT project this month I made two cards. I used the folk art
digi. I printed the button banner off in different sizes and coloured them in. In the top one I also used jiggy and turned the buttons into a kite for him to fly. Then I used the banner in large format and made him a frame.  In no two I started a pirate party lol. I found the topper in my stash so I used the buttons as a banner and put party onto it. My pirate is on red and black card and the background is a paper from my stash with red an white leaves on it. Its also matted on the same red and black card. I found a treasure box stamp and put it onto brown card. Then I hunted through my box with the dissected jewellery in it and found a coin a padlock a steering wheel and some coloured jewels for the treasure to finish off. An awesome card that I love.