Followers

Thursday 31 May 2018

Post it note gift box tutorial for teachers gift v 1 Thursday 31st May using stash and Stampin Up

 Hi again everyone,

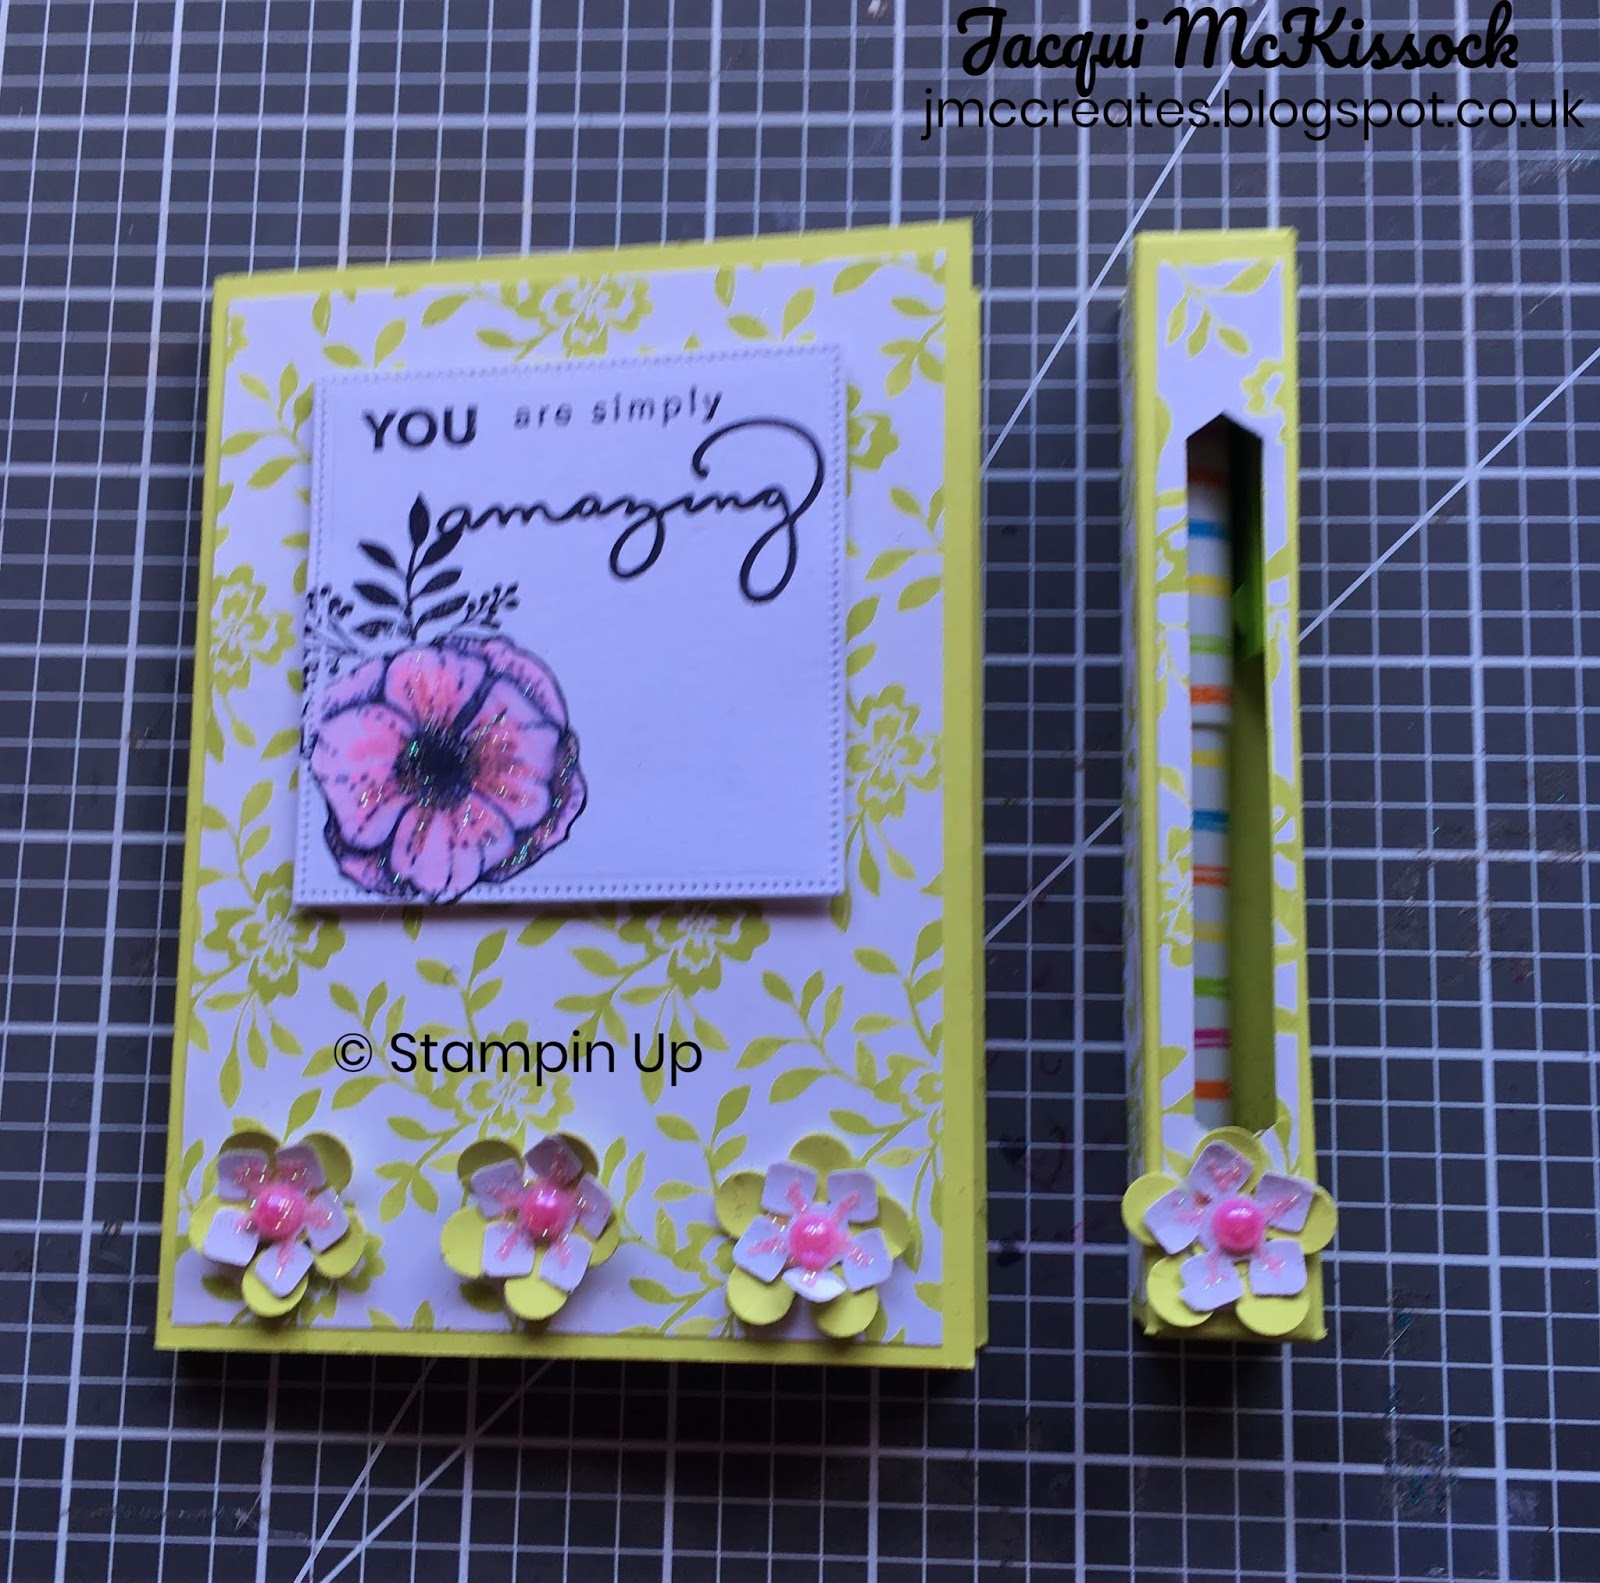
I've popped in with the first of my post it note boxes ideal for teachers gift.

For this one I've used papers from my stash along with Panda Party from 2018 saleabration which ended March 31st.


The Thank you is from my stash and the inside sentiment is from Tabs for everything.
For this one I've used Sweet Soiree papers which are retiring 31 May 18.  

I've created my front panel using the Flirty Flowers also retiring 31 May 18.

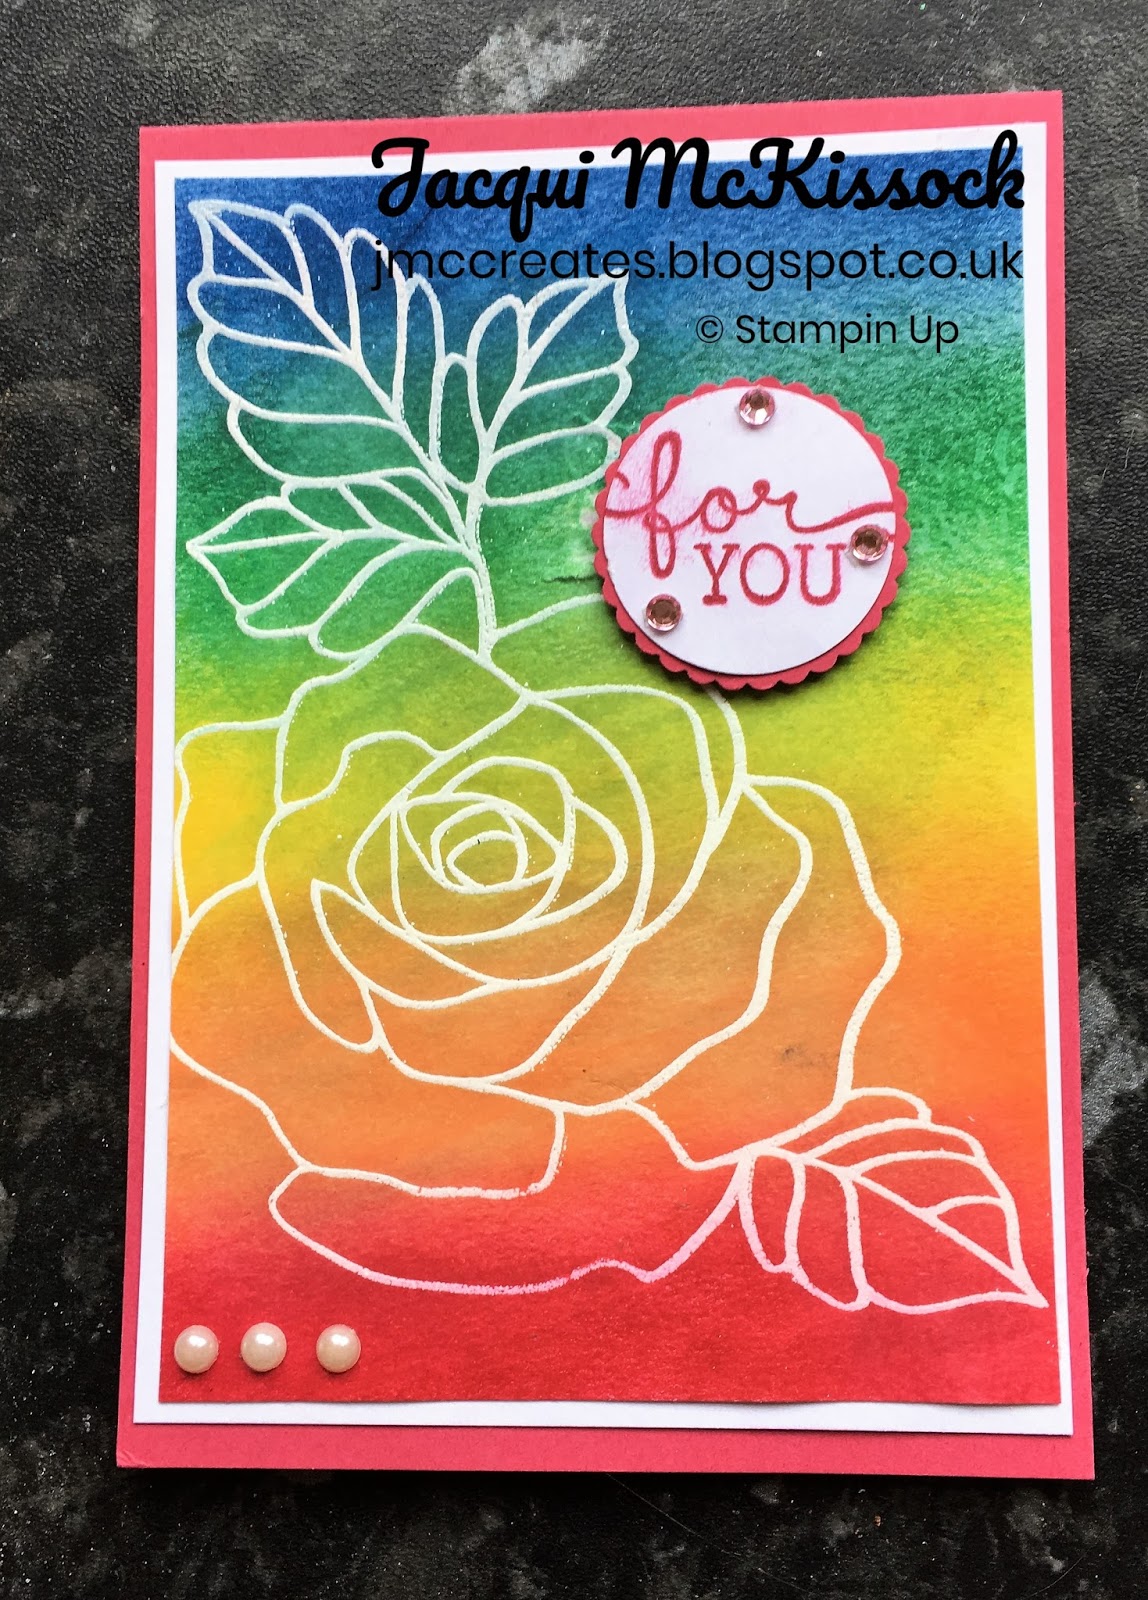
The thank you for this one comes from a new stamp set available June 1 called Detailed with Love.

I've used gorgous grape also available June 1st 18.

Measurements in Inches

Box for post is 5 x 5 re-inforced
Score all sides at 1/2 and 1

Wrap 7 1/2 x 3 1/2 
Score LS at 3 1/2 and 4 1/8

Stampin Up Supplies Used

Sweet Soiree Dsp
Flirty Flowers Stamps
Detailed with Love Stamps
Party Panda Stamps
Gorgeous Grape ink

Youtube
Facebook
Email:jacquirobinson6@gmail.com

Hope you like
Till next time

Jacqui out xx

Tuesday 29 May 2018

Z fold card Tutorial using Stampin Up

 Hi there everyone,

Jacqui back with another creation for you.

I've been wanting to make one of these Z fold cards for a while and I finally did it yay!!

I'm using all my retiring Dsp to make way for all the new stuff.  Hooray!

Measurements in Inches

Base card 11 x 5 1/2
Score LS at 2 3/4 and 5 1/2

Z fold section 9 1/4 x 3 3/4
Score LS 2 3/4 and 5 1/2

Gold Foil Layers

5 1/4 x 5 1/4
2 1/2 x 5 1/4
3 1/2 x 3 1/2
3 1/4 x 21/2

Dsp Layers

5 x 5
5 x 2 1/4
3 1/4 x 3 1/4
3x 2 1/4


Stampin Up Supplies Used

Painted with love Dsp
Gold Foil card
Springtime Foils
Petal Palette
Flirty Flowers

Youtube
Facebook
Email: jacquirobinson6@gmail.com

Hope you like it.
Till next time

Jacqui out xx

Sunday 27 May 2018

Inked, stamped and embossed gift box tutorial using Stampin Up 26 May 18

Hi again everyone, I've got another project for you.  This time I've created a little box to hold a candle.  This was for a team challenge which was to use embossing folders.

I used inks to create the paper, then stamped it, then I cut it to size and die cut the sweet and sassy heart from it,and finally ran it through an embossing folder, then I placed green glimmer paper behind the apeture.  

As this was another project made about 2 wks ago I don't have the measurements etc as I've been ill and can't remember them.  Please be patient and checkout youtube video as I'm trying to catch up with everything.

Youtube
Facebook
Email:jacquirobinson6@gmail.com

Hope you like
Till next time

Jacqui out xx

Birtday blooms card tutorial pink and purple May 22 Youtube video

Notebook pen and box tutorial 24 May Youtube video

Teachers gift tutorial Notebook, pen and presentation box using Stampin Up

 Hi again everyone, Jacqui here with the first of my teachers gifts.  I am the proud owner of 6 grandkids and one young niece and nephew for whom I make teacher gifts every year.

This is a covered note book with a matching pen in an acetate front gift box.

Please checkout my youtube video for instructions as I made this 2wks ago but was ill so I can't find the measurements!!  Sorry!  

Stampin Up Items Used

Amazing you stamps 
Lemon Lime Twist card
Fresh Florals dsp
Youtube video
Facebook page
Email:jacquirobinson6@gmail.com

Hope you like till next time

Jacqui out xx

Tuesday 22 May 2018

Stampin Up Birthday Blooms card tutorial May 22nd

 Hi again everyone,

Today I'm sharing a card a made using the Birthday Blooms and Background bits stamps. Anyone who's seen my videos will know I have severe cataracts and can't see too well so I don't normally do any colouring.

Well when I created this my gorgeous nephew Tyler was over and he wanted to draw and colour.  So I got out this stamp and decided to colour it and for a change my eyes wern't too bad so I decided to turn it into a card and this is what I came up with.  I used Spectrum Noir pens.  

I then decided to do a video while my luck with my eyes was holding up lol.

I used Powder Pink and Blushing Bride ink to match the colouring for this one.


For my next I decided on purples and I used Sweet sugar plum and Elegant Eggplant for this one.

I do prefer the top one with the lighter background. If I was doing this one again i'd stamp off and use second generation stamping.

My card base is 11 1/2 x 4 1/8 scored at 5 3/4. 
The black mat is 5 1/2 x 3 7/8.
The white stamping section is 5 1/4 x 3 5/8.

Stampin Up Items Used

Birthday Blooms stamps
Blushing Bride Ink
Powder Pink Ink
Elegant Eggplant Ink
Sugar Plum Ink
Whisper White card
Black card

Hope you like my project.
Till next time

Jacqui out xx

Facebook page
Youtube Channel
Email: jacquirobinson6@gmail.com

Saturday 19 May 2018

Flower shop dimensional card and box 19 May Video Tutorial

Pagoda Sweet Soiree candle box tutorial 19 May Video tutorial

Pagoda box tutorial using Stampin Up Dsp 19 May

Hi again everyone, 

I'm back with another project for you.  This box was created by Linda Parker and she called it her bird house box.  I've just changed the sizes to fit the candle I was using.  It reminds me of a Japanese Pagoda so I've called it a pagoda box.


For my prototype I've used the Share what you love dsp and the circle with hugs in it from the Lovely words Thinlets.

For my second one I used the retiring Sweet Soiree dsp and the ovel die with friend in it from the Lovely Words Thinlets.


Measurements in Inches

9 1/2 x 9
Score LS 1 1/2, 3, 4 1/2, 6, 7 1/2 and 9 rotate right
Score SS 1 1/2, 6 1/2, 7 and 7 1/2
Rotate left and notch along the top of box at
3/4, 2 1/4, 3 3/4, 5 1/4, 6 3/4, and 8 1/4

You need to score diagonally from notches to each side of top squares.

Stampin Up items used

Sweet Soiree dsp retires June 1st 2018
Share what you love dsp available June 1st 2018
Lovely words Thinlets
Shaker shapes (clearance rack May 18 while stocks last)

Hope you like my project
Till next time

Jacqui out xx

Facebook page
Youtube channel
Email: jacquirobinson6@gmail.com

Card Tutorial and box using Stampin Up Flower shop stamps and punch 19 May 18

Hi there everyone, I'm back with another card tutorial.  Today I'm using the flowershop stamps and matching punch and some inks.

For this one I've used Powder Pink and Rose Red inks.

The box is made from Rose Red card

For the second one I've used Tangerine Tango and Grapefruit grove inks.

Did anyone notice my mistake???  I put the flowers in the Tangerine one the wrong way round when layering lol.

Card base is 11 1/2 x 4 1/8 scored at 5 3/4
Mat is 3 7/8 x 5 1/2
Stamped layer is 3 5/8 x 5 1/4

Box Measures in inches

10 x 7 1/2
LS score at 1/2, 5 1/4 and 9 1/2
SS score at 1/2, 6 1/2 and 7


Stampin Up Products used

Rose red card retired 1st June 18
Tangerine Tango card retired 1st June 18
Flower Shop stamps and punch retired 1st June 18
Confetti celebrations stamps retired 1st June 18
Flirty Flowers stamps retired 1st June 18

Hope you like my creations

Till next time

Jacqui out xx

Facebook page
Youtube Channel
Email:   jacquirobinson6@gmail.com 

Thursday 17 May 2018

Stamp with Joy sketch card tutorial using Stampin Up 17 May

Hi again everyone, Jacqui here with a card tutorial for you.  I made this card for a Stamp With Joy facebook page sketch.

I've used Stampin Up products and my stash so it's a Stash up yay!

I've used the Fresh Florals Dsp which are retiring end of May 18.  The stamp I used is from Confetti Celebration and I used Melon Mambo ink

The pink doily is from my stash as is the banner dies I used.  The circle is cut using another stash die which is from Die cutting Essentials 37 June 18 issue.  

So hope you like it and thanks for stopping by.

Till next time

Jacqui out xx

Stampin Up Products Used

Fresh Florals dsp retires end of May 18
Confetti Celebrations stamp set retires end of May 18

Youtube Channel
Facebook page
Email: jacquirobinson6@gmail.com

Saturday 12 May 2018

Rose wonder and inks and die card tutorial 12 May Youtube video

Stampin Up Card Tutorial using Rose Wonder Stamps and dies

 Hi folks, I'm back again with another project for you.  This time I've made some cards using inks, stamps and dies.

I've used the new Stampin Up in colours on this one with the rose wonder stamp.  I first stamped the Rose wonder with versamark and embossed with white powder.  Then I brushed the inks across.  The new in colours are, Lovely Lipstick, Grapefruit Grove, Pineapple Punch, Call me Clover and Blueberry Bushel.  I finished with a sentiment from Birthday Blooms and some white and pink gems.

The card base is Rose Red.
 For This one I used the inks Tempting Turquoise, Lemon Lime Twist, Daffodil Yellow, Tangerine Tango and Rose Red.  

I cut the die from a piece of Gold Glitter Card then placed the negative over the inks and placed the die cut into it.  I used a Birthday Bloom sentiment and Rose Wonder frame in gold embossing powder on Lemon Lime Twist card and the card base is Lemon Lime Twist.

As always I finished with gems.
 I've used the same inks for this one but used Stampin Up Gold Foil sheets instead and the sentiment and base are Tempting Turquoise.
This is another stamped one but I used Glossy card and clear embossing powder for the image.   Once dry I added the inks Rose Red, Wisteria Wonder and Blueberry Bushel.  The card base is Rose Red and I finished with a sentiment and gems.

Measurements in Inches

Card bases are 11 1/2 x 4 1/8 scored at 5 3/4
Mats are 5 1/2 x 3 7/8
And layer for inks and stamps is 5 1/4 x 3 5/8

Stampin Up Items Used

Glossy White Card
Whisper White Card
Rose Red Card
Tempting Turquoise Card

Rose Wonder Stamps
Rose Wonder Dies
Birthday Blooms Stamps

Inks
Tempting Turquoise
Tangerine Tango
Daffodil Yellow
Lemon Lime Twist
Rose Red
Wisteria Wonder

Blueberry Bushel
Call me Clover
Pineapple Punch
Grapefruit Grove
Lovely Lipstick

I really hope you like my cards.
Till next time

Jacqui out xx

Youtube Channel
Facebook Page
Email: jacquirobinson6@gmail.com

Tuesday 8 May 2018

Gift bag tutorial using Stampin Up Bundle of Love


 Hi there folks, I'm back with another project for you.  I had to have another operation on 26th April so I'm under orders to take it easy BUT I still need to craft!!! lol  I saw this gift bag on Mixed Up Craft and I decided to make it as it was easy to do and didn't take long.  I just grabbed the stuff I needed sat at my bench and off I went!!!

So once I started I decided to make some more and did some different variations.  This one looks all summery to me.  


I have to say I adore this one.  I made it for the gifts I made for the nurses and I used A3 card.  The card is pearlescent and I've teamed it with gold foil card and some cream for the sides.  If you'd like the sizes just contact me (details below).  I've used the blooming love heart dies for decoration.  The tag is from Elizabeth Crafts and the bow is from Tonic.

This one is pure Stampin Up.  I've used Bundle of Love dsp,  The Scallop Tag Top Punch, soft sky card and A little wild stamp.  The heart is from my stash.

Measurements

12 x 12 (2) Score 1 side at 1

12 x 4 (2) Score both SS 1/2 each side and LS 1

12 x 3 (1)

12 x 1 (2)

Hope you like it
Till next time
Jacqui out xx


Facebook page
Youtube channel
Email: jacquirobinson6@gmail.com

Saturday 5 May 2018

Ronaldo/Real Madrid Photo Album for Tyler 5 May 18

 Hi there folks,  I'm back again with another project for you.  

This project is for my amazing nephew Tyler.  I made a Micky Mouse Album for my grandson TJ and when I showed Tyler he asked for one.

Unfortunately for me he's only interested in football, Ronaldo and Real Madrid!!!  

It wasn't easy but here's what I came up with.
 I followed a tutorial from Steph at Effi Ann Cards on her youtube channel.  She made one that took A5 size papers, all I did was make mine 
a little smaller.
 I found some free images on google and added them into my craft artist program.  Then I replicated them to make some background papers.

I printed some large images onto some card and scanned them into my brother scan n cut to cut them out. 

I added these as decorative accents along with some words cut from glimmer paper.
 There are 6 double sided pages and each one of these has another double sided page inside.  


To finish of I bought some collectors football cards which come in protective sleeves.  I stuck the sleeve down so the cards are protected but can still be removed.  

Inside the back page is a flip section that holds another 9 photo's as I decorated the top one.
So hope you like my creation and don't forget to check it out on my youtube channel.

Till next time

Jacqui out xx

Facebook page
Youtube Channel
Email: jacquirobinson6@gmail.com

Thursday 3 May 2018

Gift box tutorial for 4 nail varnish & wipes Thur 2 May Youtube video

Stampin Up Gift box tutorial for 4 nail varnish and some wipes


 Hi there folks, Jacqui back again with another project.  This time we're making a beautiful gift box to hold four nail varnish and some remover wipes.


I made this one from some foil card in my stash and Old Olive card.


 For this one I've used my new Stampin Up dsp Share what you love and it's available now!!
I decorated the tops with some flower shop stamps and punch and the foliage is from Petals and more thinlets.

Measurements in Inches

Base 8 1/2 x 6 1/16
Lid 8 1/2 x 6 1/16
Score all four sides at 1 1/2 on both.

Insert section 11 7/16 x 4
Score short side at 2
Score long side at 3 1/16 from both sides
Back attachment section 5 3/8 x 3
Score Short side at 1 5/8
Varnish holders (4) 5 1/2 x 3
Score short side at 1 1/2
Score long side at 1 1/4, 2 1/2, 3 3/4 and 5

Stampin Up Supplies Used

Share what you love Dsp
Flower shop stamps and punch
Petals and more thinlets
Grapefruit Grove ink pad

Hope you like my project and give it a go.
Till next time

Jacqui out xx

Youtube
Facebook
Email: jacquirobinson6@gmail.com

Tuesday 1 May 2018

Stampin Up Petal Passion exploding gift box for scented tin candle. May 1st Youtube Video

Handmade Stampin Up Card Tutorial uing Background bits Sat 28 April Youtube Video

 Yout 

Exploding box for candle in a tin using Stampin Up and stash.


Hi there folks, Jacqui back again with another project for you.

Today I've made an exploding box that holds a scented candle in a tin.  These are pretty and expensive looking so they make a perfect gift, especially coming up to year end for teachers farewell gifts.

The first one I made using some 12 x 12 card and card from my stash, that I purchased at the range.  It's also got some glimmer card that makes the paper stand out and gives it that expensive bling look.


The second one I made using 12 x 12 black card and the retiring Petal Passions papers from Stampin Up.  I've added white glimmer paper as my bling layer on this one and it's what the flower is made of too.

Stampin Up Items Used

Petal Passions papers
Touches of  Texture stamps
Sunshine and Rainbows stamps
White Glimmer Paper
Blue Myths and Magic Glimmer Paper
Scallop Circle Punch 1 3/8

I really hope you like my creation and give it a go it's well worth it.  

Till next time 

Jacqui out xx

Youtube
Facebook
Email: jacquirobinson6@gmail.com